로그인 성공 액션 추가하기
SecurityConfig에서 successHandler을 추가한다.
@Overrideprotected void configure(HttpSecurity http) throws Exception {http//csrf 토큰 검사 비활성화.csrf().disable()//acess 제한 허용.authorizeRequests()//login page는 허용 (안그러면 무한루프에 빠짐).antMatchers("/login").permitAll()//그 외 모든 접속은 제한됨.anyRequest().authenticated().and()//로그인하는 경우에 대해 설정함.formLogin()//로그인 페이지.loginPage("/login").loginProcessingUrl("/loginAction").usernameParameter("email").passwordParameter("pw").successHandler(new CustomLoginSeccessHandler());}
AuthenticationSuccessHandler을 구현해야 하고 onAuthenticationSuccess를 반드시 오버라이드 해야 한다. 아래 코드는 로그인 성공 시 세션을 만들어서 추가한다.
CustomLoginSeccessHandler
public class CustomLoginSeccessHandler implements AuthenticationSuccessHandler {@Overridepublic void onAuthenticationSuccess(HttpServletRequest request, HttpServletResponse response,Authentication authentication) throws IOException, ServletException {HttpSession session = request.getSession();session.setAttribute("greeting", authentication.getName() + "님, 환영합니다.");response.sendRedirect("/");}}
로그아웃
SecurityConfig에서 logout 설정을 추가한다.
@Overrideprotected void configure(HttpSecurity http) throws Exception {http//csrf 토큰 검사 비활성화.csrf().disable()//acess 제한 허용.authorizeRequests()//login page는 허용 (안그러면 무한루프에 빠짐).antMatchers("/login").permitAll()//그 외 모든 접속은 제한됨.anyRequest().authenticated().and()//로그인하는 경우에 대해 설정함.formLogin()//로그인 페이지.loginPage("/login").loginProcessingUrl("/loginAction").usernameParameter("email").passwordParameter("pw").successHandler(new CustomLoginSeccessHandler()).and().logout().logoutUrl("/logoutAction").logoutSuccessUrl("/login");}
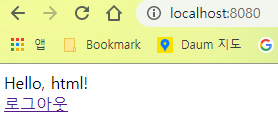
로그아웃 화면
<!DOCTYPE html><html><head><meta charset="UTF-8"><title>Main Page</title></head><body>Hello, html!<div><a href="/logoutAction">로그아웃</a></div></body></html>
테스트
로그인 성공 화면에서 로그아웃 클릭 시 로그인 화면으로 오게 되고 인증이 풀리는 것을 알 수 있다.