dependency 추가
pom.xml에서 Spring security와 관련된 의존성 2개를 올린다.
<!-- https://mvnrepository.com/artifact/org.springframework.boot/spring-boot-starter-security --><dependency><groupId>org.springframework.boot</groupId><artifactId>spring-boot-starter-security</artifactId></dependency><dependency><groupId>org.springframework.security</groupId><artifactId>spring-security-test</artifactId><scope>test</scope></dependency>
WebSecirutyConfigurationAdaptor 설정
WebSecirutyConfigurationAdaptor을 상속받은 클래스를 만들고 @Configuration, @EnableWebSecurity 어노테이션을 추가한 후 configure를 오버라이드한다.
@Overrideprotected void configure(HttpSecurity http) throws Exception {http//csrf 토큰 검사 비활성화.csrf().disable()//acess 제한 허용.authorizeRequests()//login page는 허용 (안그러면 무한루프에 빠짐).antMatchers("/login").permitAll()//그 외 모든 접속은 제한됨.anyRequest().authenticated().and()//로그인하는 경우에 대해 설정함.formLogin()//로그인 페이지.loginPage("/login").loginProcessingUrl("/loginAction").usernameParameter("email").passwordParameter("pw");}
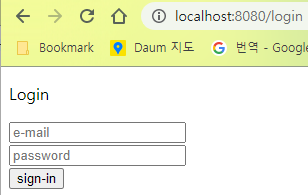
로그인 화면
위에서 설정하였듯 From action을 /loginAction으로 한다.
<!DOCTYPE html><html><head><meta charset="UTF-8"><title>Login Page</title></head><body><form action="/loginAction" method="POST"><div><p>Login</p></div><div><input type="text" id="email" name="email" placeholder="e-mail"/></div><div><input type="password" id="pw" name="pw" placeholder="password"/></div><div><input type="submit" value="sign-in"/></div></form></body></html>
컨트롤러 설정
위에서 설정하였듯 로그인 화면 url을 /login으로 한다.
@Controllerpublic class LoginController {@RequestMapping("/login")public String login() {return "user/login";}}
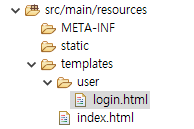
스프링 기본설정이 html파일은 templates 내에 만들어야 한다. 그래야 컨트롤러에서 리턴을 .html을 하지 않아도 Resolver에서 찾을 수 있다.
테스트
localhost:8080 으로 접속하면 로그인 화면으로 이동한다.
콘솔에 뜬 generated security password를 이용해 접속하면 index화면으로 이동한다.